Welcome to MOTOsafety!

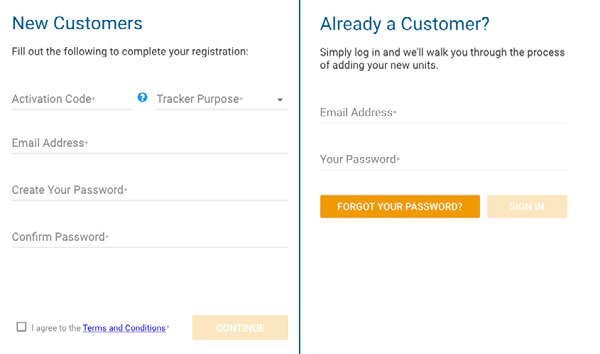
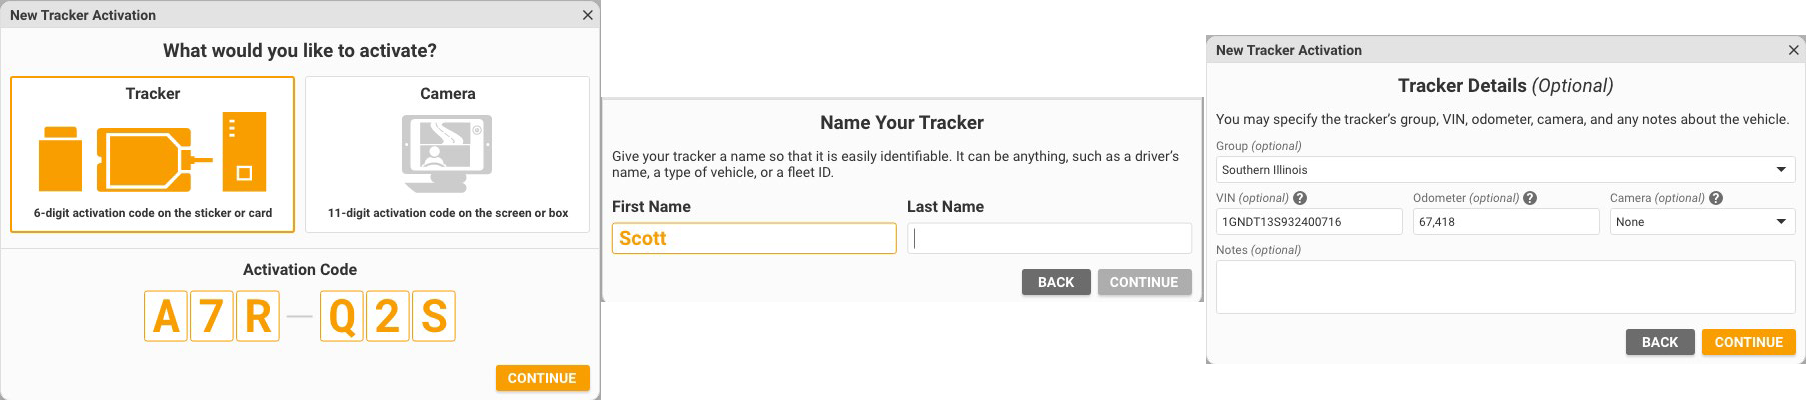
This simple step-by-step guide will walk you through activating your account and installing your GPS tracker. You’ll also find easy instructions to customize your Customer Portal for tracking vehicles, monitor reports, set alerts, and much more. Let’s get started!

If you prefer, you may also download this information in a PDF.

Step 1: Activate your account

  1. Open your web browser (Chrome is recommended) and go to: https://activate.motosafety.com
  2. You will be directed to the Activation Page where you will finish your account registration. Fill out the following information:
    • Activation Code: You can enter either the Activation Code found on your device OR your Billing Account Number (BAN) provided in your confirmation email.
    • Email Address: Please use the email address you provided when completing the order.
    • Create/Confirm Your Password: Make it strong and secure!
    • Read through our Terms & Conditions and then click the radio box to agree before clicking “Next”.

Activation

Step 2: Device Activation

  1. Welcome to your portal!
    • If you entered in your activation code on the previous screen it will auto populate here.
    • If you entered your Billing Account Number (BAN), you will need to enter the activation code shown on your device here.
  2. Name your tracker based on the naming convention you use to manage your vehicles.
    • Some common ways to name your vehicle: Blue Truck, Van ##, Sophie’s Car, Ford F150, Tractor ###, etc.
  3. Enter in any optional information you would like to add for your tracker.
    • Tip! If you are adding trackers into multiple groups, complete Group Setup before activating the remainder of your devices.
  4. Congratulations! You have now set up your first device and your portal has been activated for use. From here, you can either choose to Activate More Trackers or Complete the process and begin using your system.

Device Activation

Step 3: Installing Your Plug-In Tracking Device

Locate the OBDII port of your vehicle and connect your device.

If you need help locating the connector, please reference your vehicle’s owner manual. You may use the enclosed zip tie to secure the device and prevent tampering.


When removing the device from your vehicle, make sure you grasp the device as close to the port as possible.

OBD install

Start your vehicle, and check the lights on the GPS.

If your device has three lights on the bottom:

  • Orange Fast Blinking = Searching for cellular network
  • Orange Slow Blinking = Connected to network
  • Orange Off = Cellular modem off (sleep mode) or disconnected
  • Blue = Internal use only
  • Green Blinking = GPS lock (connected to satellites)
  • Gree Off = No GPS signal / acquiring satellites

If your device has two lights on the side:

  • No Lights = The device is not receiving power
  • Green Slow Blinking = The device is working normally
  • Green Fast Blinking = Ignition is on and device is charging (device is working normally)
  • Red Blinking Once Repeatedly = Bluetooth error
  • Red Blinking Twice Repeatedly = Cellular error
  • Red Blinking Three Times Repeatedly = GPS error
  • Red Blinking Five Times Repeatedly = Modem error

Your vehicle must be outside and not in a covered area so that it will receive GPS signal. When working properly, the orange and green lights will be on. You should see your car’s location on the map (may take up to two hours).

IMPORTANT NOTICE: remove device before jump starting the vehicle.

That's it! You're ready to start tracking.

Now it's time to start customizing your account. Our handy PDF guides will walk you through setting up users, geofences, alerts, and more.

Account Setup Guides

Back